Juggling clubs is an activity that is great play and exercise at the same time. A few friends started getting together just to juggle clubs for fun. We don’t do it often enough…but here’s a sampling.
Technology, Speaking, and Entertainment
Juggling clubs is an activity that is great play and exercise at the same time. A few friends started getting together just to juggle clubs for fun. We don’t do it often enough…but here’s a sampling.
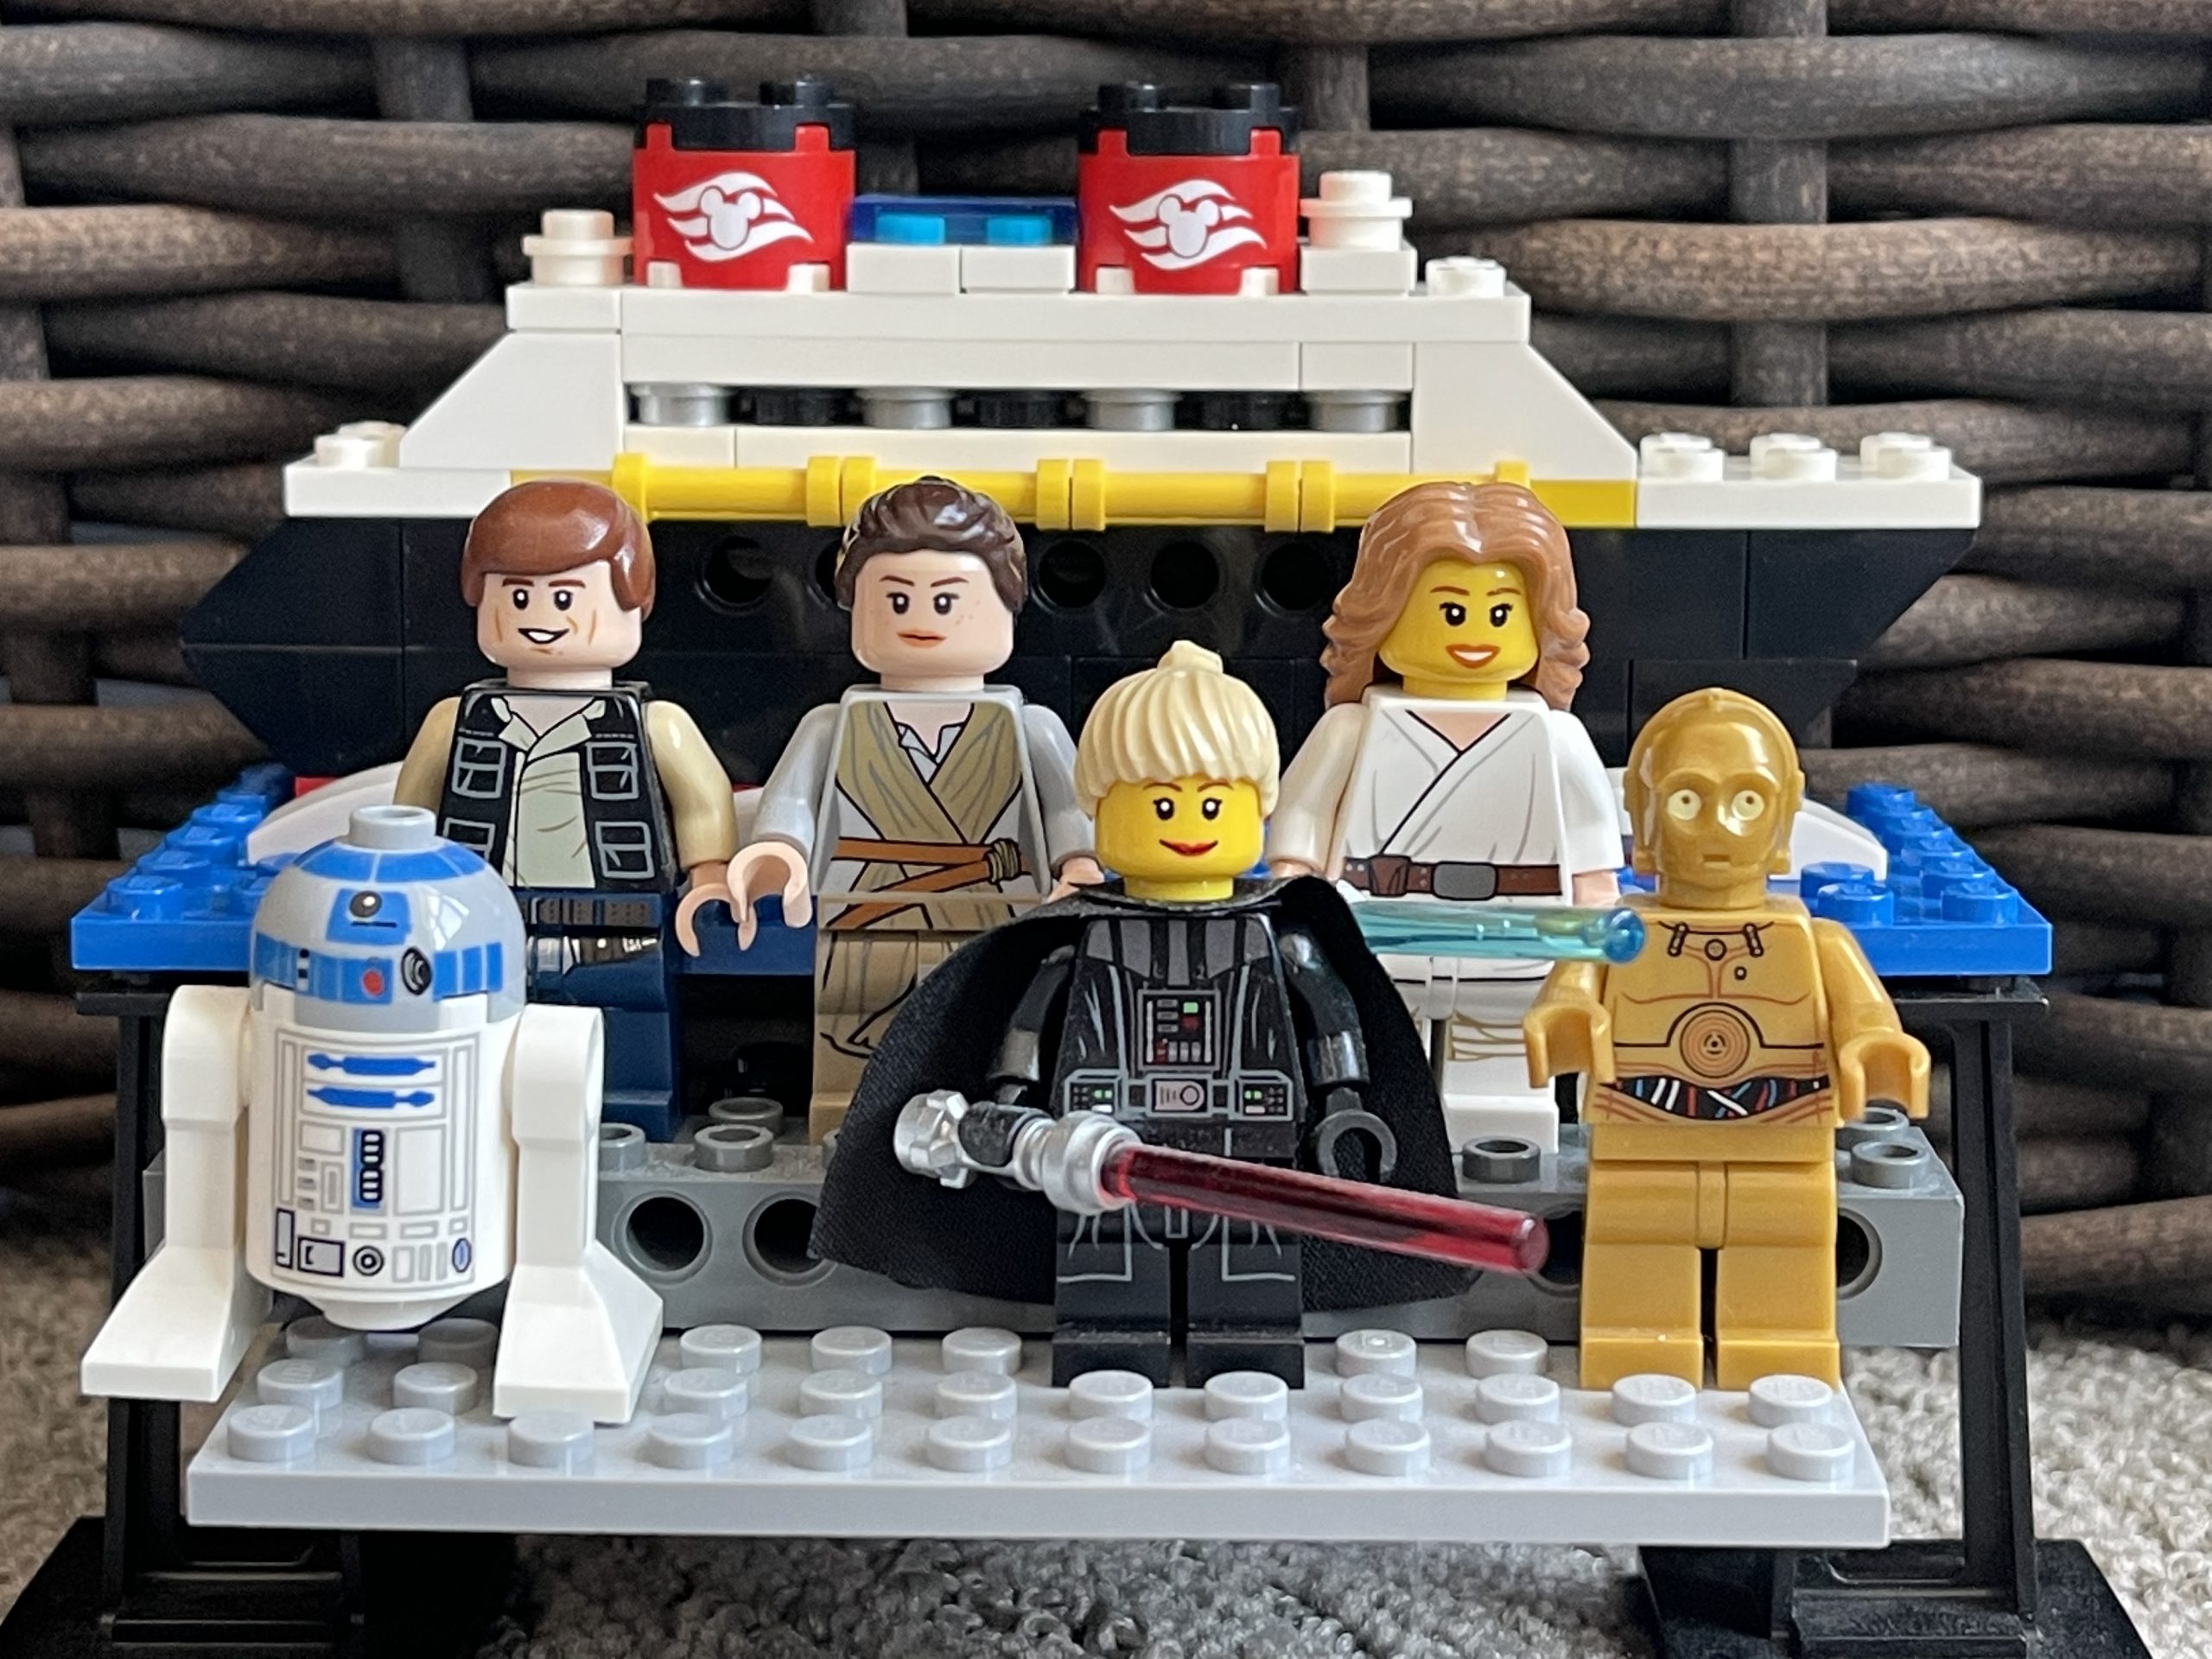
Several years ago…in 2017 our family took a Disney Star Wars cruise and it was an amazing experience. First, a couple of photos…


and today in honor of Star Wars day and remembering fun times, I’ve created a LEGO model to commemorate the event…
Northpoint Church has some of the most creative Christmas music available. It’s quite an enjoyable time to spend watching some of these with your family during the holiday season.
2013 Kids write the best Christmas music
2012 Les Miserables
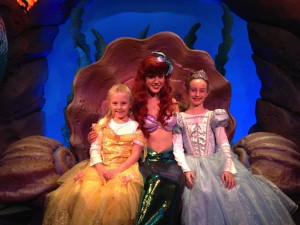
We recently visited Disney for a week. Near the end of our trip our 6 year old daughter Brielle got very sick with a stomach ache. It cuminated in throwing up in the park near the Dumbo ride. Disney went into action. Immediately she was surrounded by a wall of Disney employees creating a feeling of privacy including an EMT with a stretcher. (Some of Mickey’s doctor friends!)
They tested her blood sugar level and found she was not running a temp. After seeing she was OK to go on, we were escorted to a nearby gift shop where they gave our family whatever drinks we wanted. Then our guest guide asked Brielle about her favorite princess. She then took us past the 40 minute wait line to the front to get a moment of time with Arielle, the Little Mermaid including a photo and autograph.
As we left the park, we stopped in a shop where another Disney employee noticed Brielle didn’t look like she was well. When he found out she had been sick he watched us to see what she liked in the store. Once he knew, he brought the $30 stuffed animal up to the counter and gave it to her at no charge. He said that they want everyone to have a good time and felt sorry that she was feeling sick…get well soon.
The following day Brielle was still not well enough to go to the park…but we had reservations for dinner at Cinderella’s castle. Not to be missed, we timed it right to give her Tylenol, Pepto Bismal, etc…and were able to squeeze out a 3 hour window where she felt well enough to go, see all the princesses, and enjoy part of the evening.
We’re telling this story not to complain at all about our experience…but to celebrate the fact that Disney gets it. We talked to several “cast members” at Disney and heard no negative stories about working there.
So what lesson did we learn? We’re always going to have a sick kid when we’re at Disney. : ) Seriously, the Disney employees are empowered to make guest experiences great. How can you empower your employees to make smart decisions that make customers happy?
A special moment for me at Disney World was visiting Mickey Mouse at the Town Square theater where you can go backstage to see Mickey preparing to be onstage as a magician. I was given the special opportunity to perform some magic for Mickey! I did one of my favorite illusions where I multiply my money…Something that really doesn’t happen often at DisneyWorld. : )
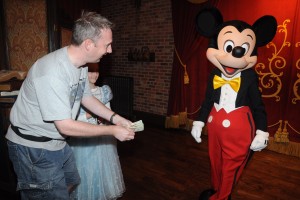
Mickey watched intently and then he was so surprised that he stepped back in disbelief! It was an amazing moment and so fun to be able to provide a bit of magic to someone who has made magic happen for many millions of people.
Going back a little in time…here’s some sage advice from us as new parents when our babies arrived in 2004 and 2006.

Arianna Elizabeth Cimbura made her appearance at 2:30 pm on Sunday, April 25, 2004. She weighed in at 7 pounds and 19.5 inches. Brenda’sbirth plans were this: “Give me lots of medication. I don’t want to feel it.” Well, the baby came so fast that she delivered naturally and without any pain medication at all. So much for plans. We thought we’d call her Arianna unless she objected…and she didn’t. She seems to answer to it well. At least at this stage.
Brielle Madeleine Cimbura made her appearance at 2:50 am on Wednesday, May 3, 2006. She weighed in at 5 pounds 11 oz and 20.5 inches.
They were truly the most beautiful babies in the world. (That’s her daddy speaking.)
Baby Care Tips
I’ve put together some baby care tips gleaned from our experience:

Indispensable items I thought I’d never need:
Earle Dickson invented the band-aid in 1921. What ever did kids do before that time?
Band Aids are a big deal for kids. In the times of BK (Before Kids) we had a small first aid kid for emergencies. Now we’ve got bags of band-aids stashed in locations throughout the house for when the wailing begins “I fell off my scooter!” “I slid off the swing!” It happens all too often. Sometimes I fear someone will think we’re abusing our kids they have so many bumps, bruises, cuts, and scrapes.
Kids seem to fall down and get hurt way more often than adults. Maybe it’s because they’re taking more risks and getting involved. They sure play hard.
I believe one reason that band-aids are a big deal is because they fall into the sticker category. Did you know that band aids come in varieties of sparkly, colored, Muppets, Dora, Transformers, Phineas & Ferb, Sponge Bob, Tinkerbell fairies, Spiderman, Toy  Story, Barbie, Mickey Mouse, My Little Pony, Cars, Disney Princeses, and Hello Kitty? My kids do…and they’ve taken inventory of every type we have. There are even “collector series” band-aids. Does someone actually have a collection of band-aids?
The practical side of me wants to buy the mega pack generic band-aids with 120 strips all the same size and all one color…flesh tone…and get the most for my money. It’s just a band-aid…and like toilet paper you end up throwing it away…so who cares what it looks like?
But colored Band-aids announce to the world that something tramatic happened. You got hurt and there’s a story behind it. No sense in hiding it. Let it out! Away with the flesh-tone! “Look! I fell down…and it was a big fall. But it’s OK. I’m going to get better. Wanna see!?”
Our girls are constantly asking for band-aids. I should buy stock in the company. They want to put a band-aid on even when there isn’t an owie. As parents we protest “There isn’t even any blood! You don’t need one.” Maybe that’s the point. If I put one on my body, then I feel better.
Band-aids represent healing. They are something that you can do…even if there’s not a lot you can do. You got hurt. It’s going to be painful for a while and you just need to wait it through. Once we put the band-aid on, your pain is redirected to the pretty sticker on your body and it doesn’t hurt as much. It’s actually a small miracle…and worth the $2.95 for the special box.
So yesterday when we were at the store, I let them each choose a box of fun band-aids…and maybe I’ll even choose one for myself next time. For now, I’ll use the flesh toned ones and draw on them with a marker for some pizazz. The best of both worlds.
The next time you’re in pain, think about what your band-aid is…a distraction from the hurt. Maybe it’s a listening to favorite song, immersing yourself in your hobby, talking to a trusted friend, taking a bike ride, or escaping for a walk in the woods. Whatever it is, relax in the fact that you’ll get through this. Even if your band-aid doesn’t completely take away the pain, it may make it tolerable and remind you that you’re OK and you’ll get better soon.
Our girls have their future life figured out. Tonight, we asked them about it.
What kind of husband are you looking for?
Arianna (age 7) – “I want a guy with brown hair that loves me. He should not be allergic to anything. He should know how to dance, work at the Apple Store, and love God.”
Where are you going to live?
“We’ll live in North Oaks West because there are lots of trees and deer there. My husband should like deer.”
Are you going to have any kids?
“I’m going to have five kids and give two to Brielle. The two girls I keep will be named Cimburia and Elisia. The boy will be Alex.”
Brielle (age 5)
“I’m going to live next door to Arianna and adopt two kids from Arianna. I’ll have one girl named Elise and one boy named Jack. The boy’s nickname will be Michael Jackson.”
OK…any boys age 0-11…you need to wait 20 years before these girls are available. (Dad)
Tried something new a couple of days ago…Trampolining! A new place opened nearby called Zero Gravity devoted to bouncing around. Fun new things you can try:
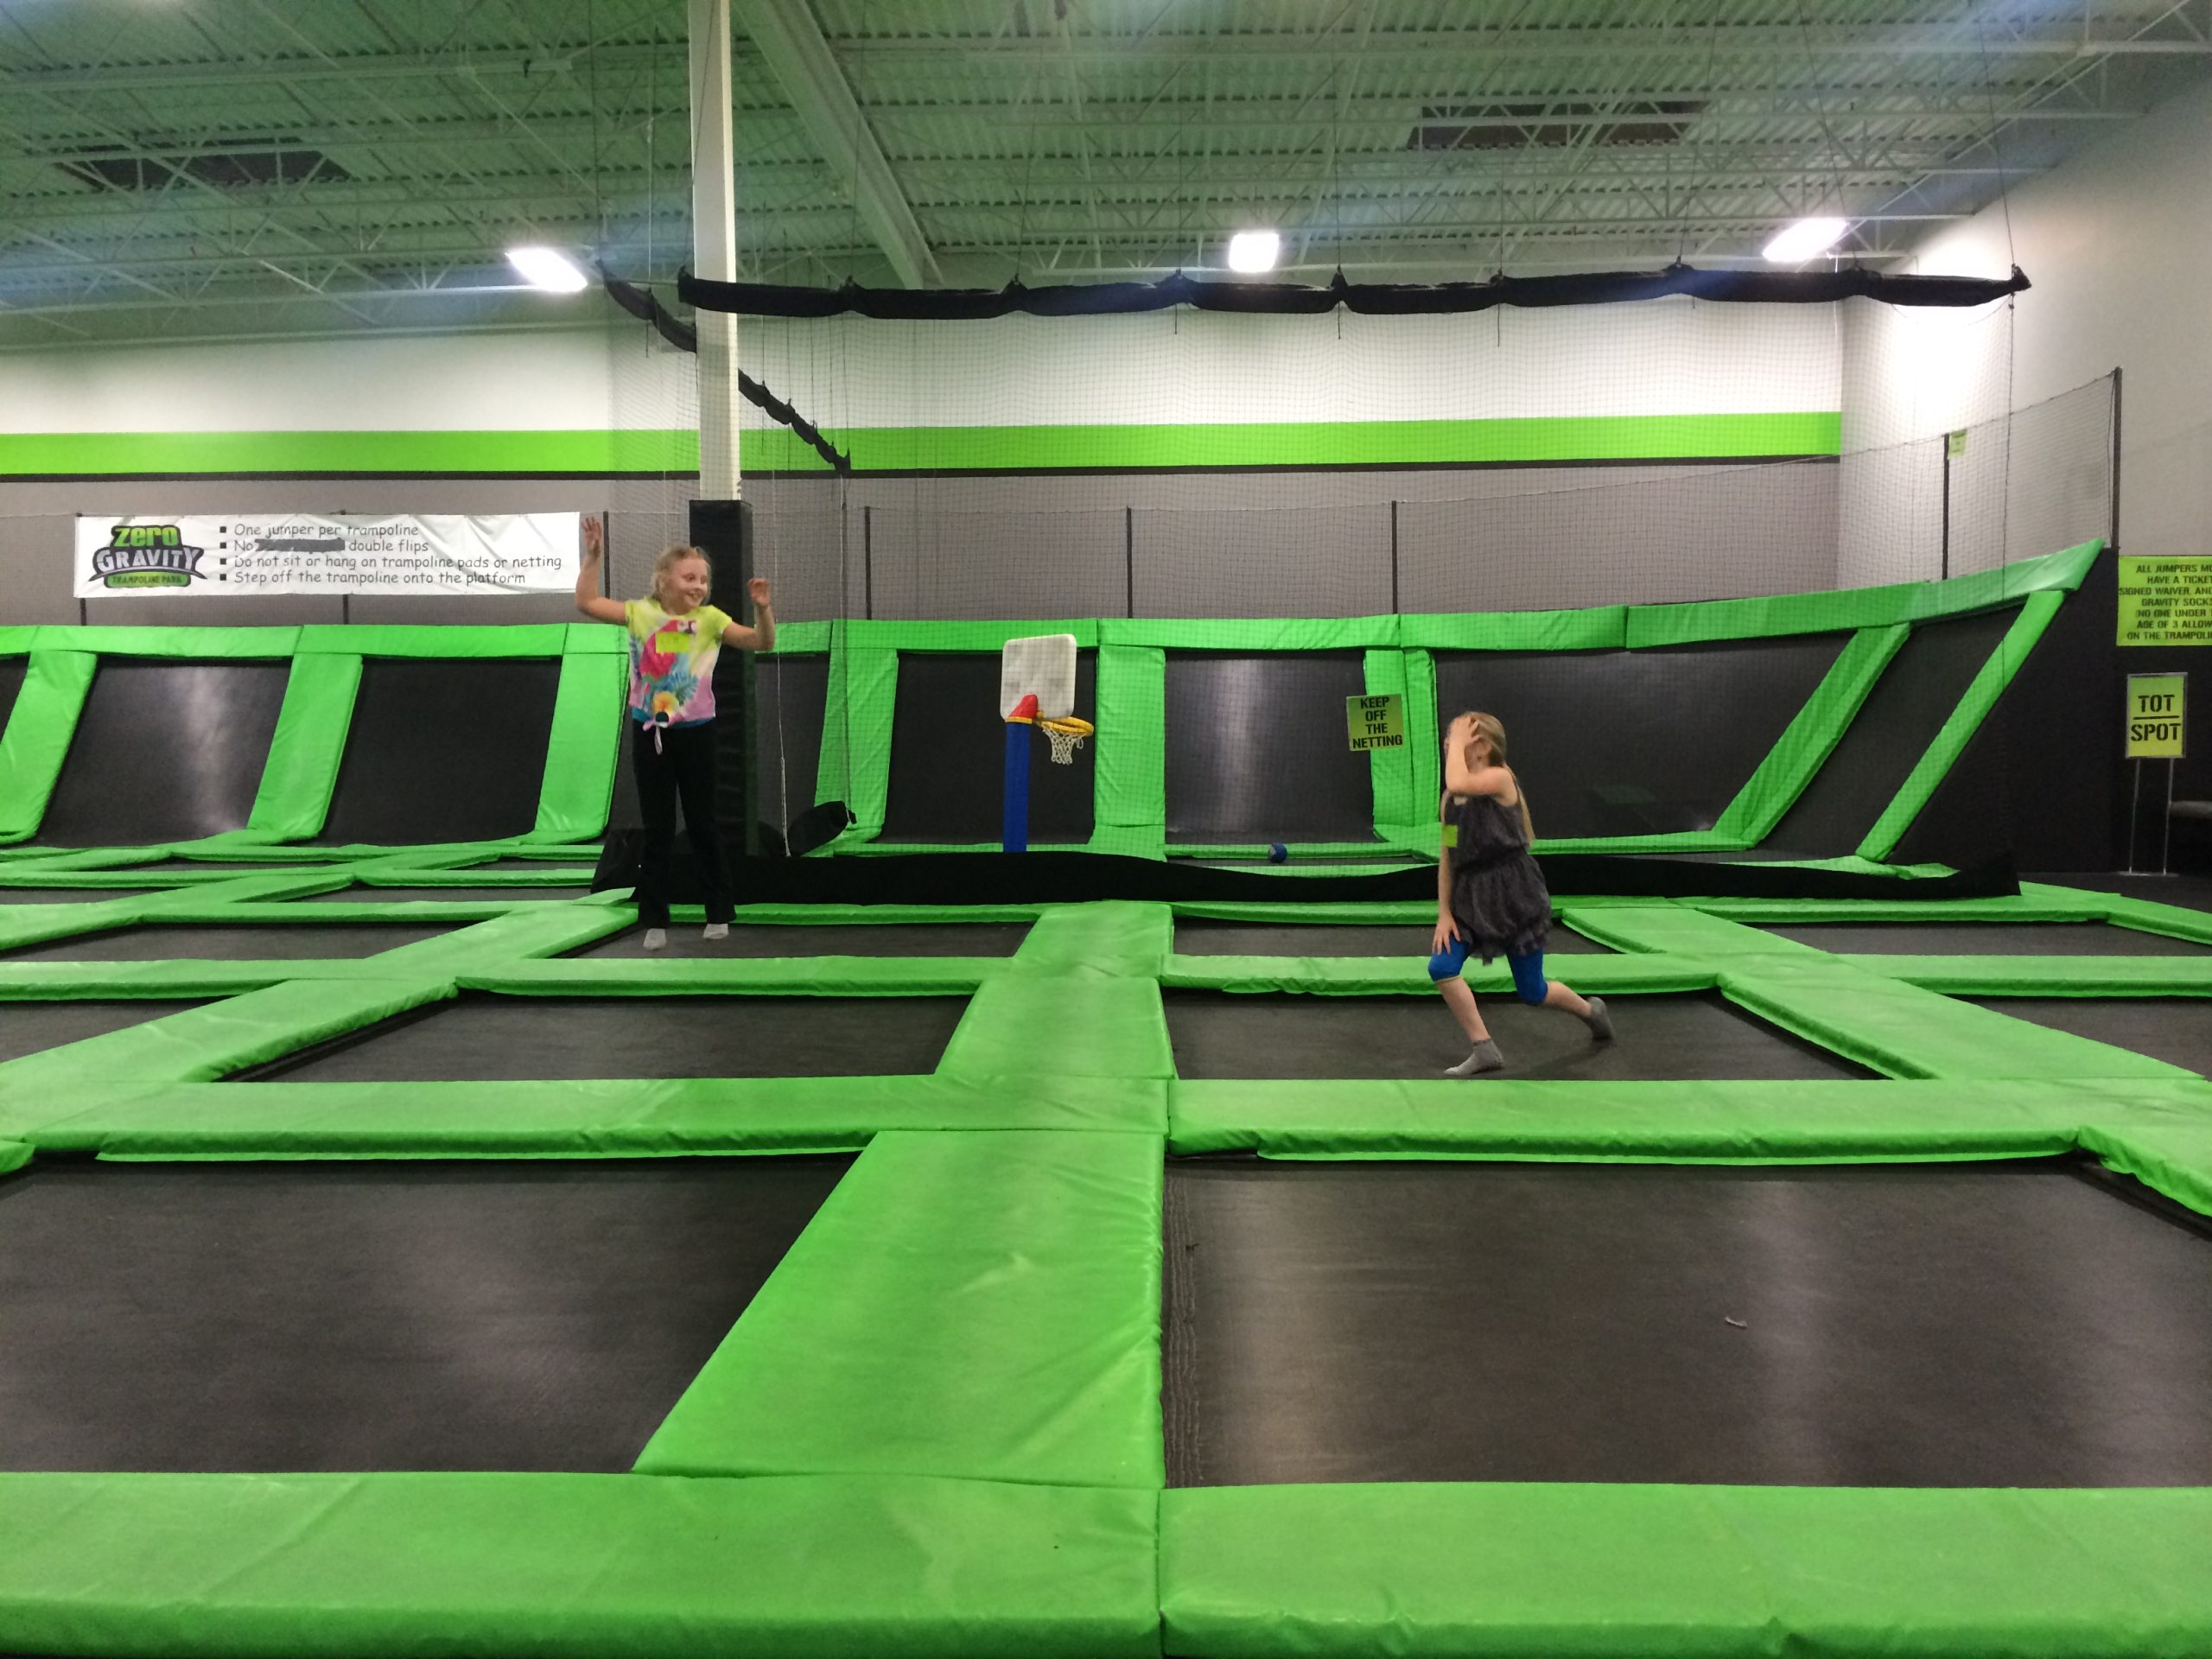
It was super fun and I want to go again…but be prepared. One hour is long enough and you will be sore for a couple of days afterwards which proves it’s great exercise.
Ever since seeing the “I Gotta Feeling” flash mob on Oprah, one of the things on my personal bucket list was to participate in a dance flash mob…so when I heard about one a few weeks ago I was quick to say “yes”. At first I was pretty intimidated by the length of the dance routine but after some practice I was able to figure it out. The real fun took place on Tuesday August 16 at noon in front of the IDS Tower smack dab in the center of downtown Minneapolis across from Macy’s.
So here’s the edited video. You can see me walking in on the left side at about 1:34 into the video. I’m kind of in the back row but you can see me sometimes as one of the few guys actually participating. During rehearsal the choreographer told us that “real men dance” for some encouragement. Sure is a great way to get some fun exercise. Brenda and the kids were there, too watching nearby.
Flash mob choreographed by Leslie Paster Fhima for the opening of the Cowles Center for the Arts in 2011 downtown Minneapolis. All the music was Minnesota Artists:
#dance #flashmob #minneapolissound #bobdylan #funkytown #junglelove #prince #minneapolis